Showing posts with label Data. Show all posts

May 10, 2012

Reaching the "100" goal


If you are an SLP who sees most of their students in small group therapy, raise your hand.

If you are an SLP who sees students in articulation therapy and finds themselves getting "creative" to practice articulation skills "around the table", touch your nose.

If you are an SLP who struggles to get more than 30 trials per student of articulation practice during a small group therapy session, pat your head.

If someone near you is looking at you strangely by now, then that means one or all of these scenarios apply to you, and we have something in common!

If there is one thing that we all know as SLPs, it's that getting a child to correctly articulate their speech sound target is a great feeling (whatever level they are at). Getting that child to do that 20 times in a session is great. Getting that child to achieve that target 50-75 times per session would be ideal! And, for that matter, getting that child to exceed 100 trials correct in a single session would be AMAZING! This is so important because we typically only see these students once or twice a week for an average of 30-45 minutes per session. That means, in 7 days, the child MIGHT say their sound correctly 100-200 times. This also means they might say this sound incorrectly when they are outside of the therapy setting 500-1,000+ times (depending on their sound target)! I just kept thinking about these odds and wondering, "How can I possibly achieve a minimum of 100 correct trials per session?"


Then it hit me one day. . .I want to try using the "speech lab" concept IN the therapy setting. The idea of "Speech Lab" was presented through RtI presentations in our district and has been used in many districts around the country. The idea during RtI is to use a "general education articulation lab" and see if students would be able to master their articulation errors in a short, intensive program without going through a full referral and evaluation process.  In the "speech lab," students rotate through various "centers" to practice their sound targets and are facilitated by a "roaming" SLP.Programs seem to vary around the country, and in our district we have "piloted" such an idea; however, we have not fully implemented this. Super Duper Publications even has a product specifically for implementing such a program in RtI with their resource "ARtIC Lab: A Bilingual Response to Intervention Program for Articulation." Follow this link to find it.


So, as I said, we do not currently implement an articulation lab in our district, and I do not currently own a specific program. However, I have taken the concepts and practices, and started to implement them in my own speech room. I needed to be more efficient with my time and my students' time in groups of 4-5 students. In my speech lab, I have students rotate through stations for 4-5 minutes per station. My stations include "Listening Center", "Table Time", and "Sounds on the Carpet". Here is a description of each station:

Listening Center--In this station, I have students sit at my desktop computer and listen to their targets. I have done this a few different ways. I have used the "Garage Band" software to have students strictly listen to words that I voice recorded. I also used "Power Point" to create several presentations where I have paired pictures and words with my voice recorded. This seems to be more motivating for the students because they can "click" through the pictures. While the Power Point presentations are my favorite, they take a little time to create. Unfortunately, my files are too big to share here at this time. For students who have minimal stimulability, I have them "listen only." As my students increase their accuracy of production with minimal cues, they are instructed to listen AND say the words they hear.

Table Time--I use this opportunity to get 1:1 time with each student. While they are with me one on one, I target the sound that is the hardest or least stimulable for them. My goal while I'm with them individually is to increase their stimulability so that target can be transitioned into a more "independent" station.

Sounds on the Carpet--In this station, it is VERY important to have the students practice their targets at the level that requires the least amount verbal cues. I have taught my students how to provide "friendly cues" to each other and encourage each other. Also, since my speech room is pretty small, I am in "earshot" of each student and can offer added cues or change their target if I don't hear accurate productions. Also in this station, the students can engage in "quick" games to motivate them such as "Trouble" or "Uno".

During speech lab, I use the tools that I have on hand and I have even created some new ones. Here is what you might need if you want to try this, too!

1. A schedule for the "Speech Lab" rotation.--Grab mine here. This is what my schedule looks like:


I have it laminated and hanging on my white board. Since it is laminated, I am able to write the students' names on the schedule to let them know what "station" they are scheduled for. On the carpet, I usually have 2-3 students at a time (my preference is 2)

2. Articulation targets per student--I use artic cards or worksheets for this. My younger students do better with cards or sheets they can access in the speech room. My older students each have their own folder with their individual speech targets and they bring them to and from their speech sessions.

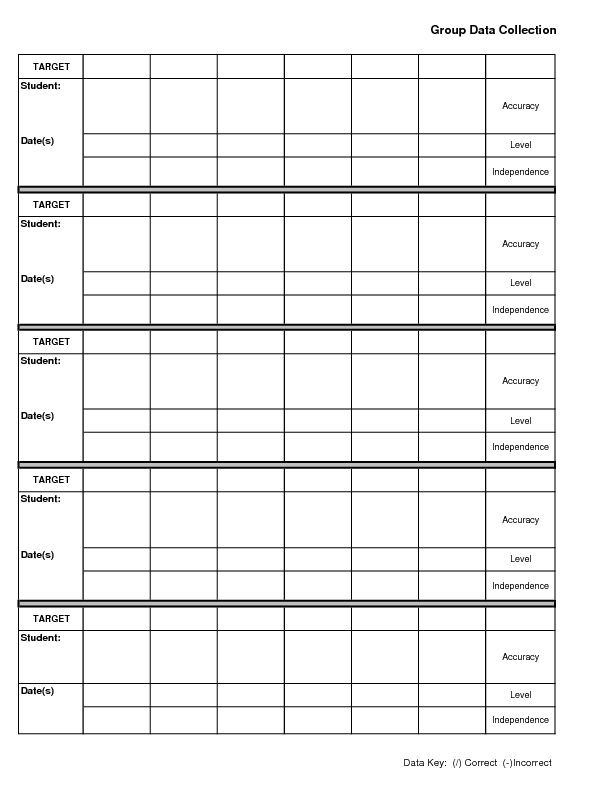
3. A Table or "area" with tools you will need for some 1:1 time such as a mirror, tongue depressors, gloves, data collection sheets, etc. for "table time". You might also want to keep a Speech Target handy. Grab mine here: Speech Target.
                          

4. Motivating games for "sounds on the carpet". We like "Trouble", "Uno", "Topple", "Look Who's Listening," or just a pair of dice.

5. Counters. We used to use tally counters; however, they broke easily (guess I shouldn't have "cinched" on the brand). Now we just use post it notes and the students tally count their sound productions. Each student is responsible for keeping up with their own count and they use tally marks. At the end, they count up their sound productions and they love counting by fives, even my kindergartners!

6. Computer or voice recorder and headphones for listening station. We use a desktop, but anything that records your voice will work. My next step is to try my new Live Scribe Echo Pen (but that will be saved for a future post).

7. A timer. I set it for 4-5 minutes per station. When they hear it, they look at the schedule and make the switch!

8. Motivator chart. This can be accomplished in ANY way. I challenge each student to say their sounds at least 100 times per speech lab session. Then I set a "group goal" to work for a prize speech day such as a "Game Day" or "Popcorn Party". I have used a pom pon jar, a sticker chart, and a graph to track their progress. They are increasingly excited when they see their progress against another grade level!

In my experience since starting "Speech Lab", here is what I have noticed:
  • Taking the time to "teach" the expectations for each station is a MUST!
  • It works BEST with students once they reach the syllable or word level of their target sound.
  • It's best for speech practice up to the sentence level. (Once a student starts connected speech tasks, it can be done, but you have to get creative.)
  • It works best with at least 3-5 students; more or less I have found to be less effective and less motivating.
  • It doesn't work very well for students with minimal stimulability.
 I have shared my experience with some of my colleagues, and the most common question that I have received has been: "How can you say that you are giving them their speech time when they are not face to face with you?" My response is, I AM face to face with all of them while they are in my room, and they are CONSTANTLY practicing their speech targets instead of waiting for their peer to finish before they can start. They are still required to be active listeners also, and I have TRIPLED the targets produced correct per session. I have now seen more students reach connected speech tasks at a much faster rate than ever before!

If "Speech Lab" sounds like fun to you, I challenge you to try it out! So, put your had down, take your finger off of your nose, and quit patting your head. . .instead, get started toward reaching the goal of 100 trials correct per session!

Have Fun!
~Orlanda

March 18, 2012

Articulation Therapy Tools

Time for me to share some of my favorite self-created articulation therapy tools!  I have many tools that I have created over the years and will be sharing more soon, but here are some starters.  These two visuals are permanent fixtures in the speech therapy room!

First, I want to share the Speech Target.  Here it is.


In my recent Pinterest and Blog browsing, I have seen similar "rubric" styles for articulation therapy, and I think it's a great idea.  The idea of using a rubric in articulation therapy came to me a couple of years ago after attending a training that focused on language therapy.  I found that I needed a way to give some positive feedback to my students in articulation therapy that were really "stuck" at becoming stimulable for their target sounds.  (The most trouble, as always, has been that R sound!)  I knew that my students were working their tails off with their oral motor exercises, traditional drill practice in therapy, and consistenly completing homework activities.  I could "hear" changes in their speech even if their targets were not completely accurate, so, the Speech Target was born.  Of course, the first one was scribbled on a piece of paper (as many great ideas begin).  But it didn't take long for my students to understand the purpose of the target and to feel their improvements.  Eventually, they were able to accurately discriminate their own speech on the target with little guidance from me.  Sound production was no longer "right" or "wrong" in speech, instead they were getting "closer to the bull's eye"! Now, the Speech Target permanently hangs on my white board and I refer to it frequently in therapy.  Occasionally, I even have the students rate each other on the target to maintain attention of all group members and give them some friendly feedback from their peers. 

Here is the other Articulation Rating Scale I found on Pinterest thanks to the folks at Peadia Staff.  This one was created by speech/language pathologist, Dala, and can be seen on her blog here: Testy Yet Trying.


The other tool that I refer to often in my speech room is the "Good Speech Posture" poster:

Most of my students in articulation therapy focus on some level of oral motor exercises at the beginning and throughout each speech session.  As many SLPs know, lots of our kids with articulation disorders have trouble with isolating their "speech helpers" from each other.  For example, many kids working on tongue tip elevation may be able to achieve this only when they raise or tilt their entire head.  Many times the entire head or body will move in the direciton of the tongue and the same goes for the jaw.  So, I have worked really hard to teach my kids the importance of good posture and moving their speech helpers independently from the rest of their body.  While this is the target for many of my students, there are some students who need the added body movements in order to achieve their phoneme production, but this is a nice tool to have around, especially for my wiggly speech students! 

I hope you can find these tools useful in your speech room!

     ~Orlanda 


March 3, 2012

Super Duper© Data Tracker App = LIFE SAVER!

Data drives EVERYTHING!!! Am I right?  And it should, no doubt about that. . .but keeping up with it is a craft that many SLPs and Teachers work hard to perfect every day!

Well, the awesome folks at Super Duper© Inc. are at it again with the addition of many apps for iPhone, iPad, iPod and now Android.  I recently purchased the Super Duper© Data Tracker App and have not regretted my $5.99 purchase!  I am a bit frugal, so I "phoned a friend" before making the purchase and she said that while she didn't frequently use it, she thought it might be worth it.  So, I took the plunge and haven't looked back!  I will say, this is not the ONLY source of data collection for me because of how it is set up. So, let me tell you about it and then I'll fill you in on how I use it to make my life easier!


When you buy the app, you first have to set up your student profile by adding "players" and assigning goals to each player.  You will also assign your measurement method by choosing from correct/incorrect or adding "approximation" or "cued".  I love that it has so many options!  I have recently started using this tool more frequently for language targets by choosing the "four" options:  correct, incorrect, approximated (or what I use as a cued incorrect response) and cued (or what I sometimes use as a cued correct response).  My co-teacher, Kelley has started using the "approximation" to count the cues per session.  The beauty of it is that you can make it work for you! 

Also from this screen, you can add a player to a "group".  This allows you to put your "data sheets" together by group.  There is also the flexibility to track data for one student at a time whether they are in a group or not, and there is also an option to remove a player from a session if they are absent.


The other cool thing is that all of your data is CALUCULATED FOR YOU!  Yes, you heard me right, you DON'T have to calculate your own data!  I think this is what takes me the longest and this is the best part about it.  And I know that all the speechies out there can identify with couting tally marks!  This is what it looks like.  You can even choose to email the data if you need to, which would be great for sharing with parents or printing for your data books!

In a recent update, they also added a "graphing" option, which is another great visual for showing progress to parents or teachers.  You can choose the date range or range of sessions to show for each student. Check it out!


I know, it's pretty amazing, isn't it!  Click this link for a video tutorial from Super Duper©.
.

Super Duper Data Tracker App Video

Now, here is the trick to using this tool. . .and the one that is "make or break" if I use it in a therapy session:  it is easiest to use this tool in an individual session OR in a small group session (2-3 students) or in a session where turns are clearly defined and used.  I can use this tool in structured groups of up to 4-5 students, but if they are not great at taking turns, it's easy to mis-mark data.  The reason for this is that you cannot see multiple player goals on one screen.  When using this tool in a group, you have to swipe the top of the screen to switch players.  In my opinion, this tool is MOST useful in my articulation therapy sessions where I am working to attain over 50 trials per student and sometimes with multiple targets. I have also learned that many sessions can be stored until I get that "free moment" where I can put the data in my service log for each student, but now that takes only a few minutes per child!

As you can tell, I love this new tool from Super Duper© and maybe you will find it a useful time saver, too!

    ~Orlanda

February 13, 2012

Our Collaborative Data Documentation Sheet

Orlanda and I were comparing notes one day earlier this year about the seemingly bazillions of data documentation sheets that we had tried over the years and how none of them ever quite fit the bill. I showed her the one that I was currently using at the time and a few days later she tweaked the format using another data sheet she had tweaked from a colleague, and together we came up with a GREAT sheet. It has been really handy that we are both using the same format so when we are co-teaching, whichever one of us isn't direct teaching can pick up each other's data sheets and document data easily.

Most of my (Kelley's) sheets are 2 sided to allow for frequency data to be collected on one side (behavioral or academic)...


...and anecdotal data on the other side.


 Obviously, I just make a note of the goal to remind me what I'm tracking. When I calculate the data I correlate it to the criterion.

If kids have a lot of goals, they have a whole sheet to themselves. Students who are only working on a few goals or if I only see them in a group instead of working one on one or in the inclusion setting,  are put on a "group" sheet. That way I can pull one sheet out for a group and track data on many students at the same time.


I color code the sheets as well, so I can quickly retrieve the one I want and make notes.
Using the same data documentation sheets allows us to easily share data across sessions for those students that we share as teacher and speech/language pathologist. This has helped our data reports be even more thorough. It has also helped us to evaluate behaviors and skills across settings.

The Group data sheets that we are using can be found here:


We have toyed with a variety of ways to calculate and measure our data, and currently we have stuck with "Percentage of trials correct".  We have considered changing to a "rubric" system, but in the meantime, we have found this method to be the most useful and we just make sure we take GREAT notes when any "unknown" factors affect our therapy outcomes!  You will see in the data Key that we use a (+) for a correct response, a (-) for an incorrect response, and (O) means we circle the type of response when it was cued.  So essentially, we have four types of responses that we document:  correct, incorrect, cued correct, and cued incorrect.  The "notes" are an important place to document the "type" of cue needed, particularly if it was an extremely explicit cue (such as "hand over hand").

In speech therapy, I (Orlanda) use the above data sheet for group language sessions and even in fluency therapy.  I have also tweaked the same type of data sheet specifically for articulation therapy with the only change being to the data key and an added "level".  Find this data sheet here:


On this form, the "level" refers to one of the following:  isolation, syllable, word, phrase, sentence, connected speech, etc.  Also, I have switched from the (+) method to using tally marks (/) because they are much faster for me to count and calculate AND I can fit more into a box (considering my goal is always 50+ trials per session).  Then I use the "independence" slot to document the estimated amount/type of cues needed for each student.  I have another data sheet that is similar but is meant for an individual therapy session.  Grab it here:


We would love to take a look at your data systems. What system do you use? Email us and we'd love to share your ideas with others.         ~Kelley and Orlanda

February 6, 2012

My Favorite Data Documentation Tool

I want to share with you a *free* system that helps me track data with some of my higher needs kiddos. Please forgive the lengthy post, but I really want this to be able to help you as well!

About a year ago, I discovered a fantastic tool to use to document daily progress on goals. The tool is called the Electronic Daily Behavior Report Card (e-DBRC). It allows me to communicate easily with parents and helps encourage student accountability. It is a free, web-based tool that was created in a joint partnership between the Texas Education Agency (TEA) and Texas A&M University.

Currently, I've only used the system for behavior monitoring, but I suspect it could be used for many other purposes (speech goals, social goals, academic goals, etc.). If your student is a visual learner and is mature enough to be involved in tracking his or her own progress, then this may be a great tool to help them take ownership of their goals. Even if your students are too young or unable to be quite so involved in the process, this is an easy way to keep parents informed about progress more often than progress notes every 9 weeks.
 This tool allows teachers to monitor an unlimited amount of behaviors through a rubric format. After setting up the behaviors and defining the criteria for 5 levels (grades A-F), you can assign specific behaviors to specific students. You are able to set up the tracking schedule in whatever way works best for you and your students. You can do a once a day track, am/pm, or by class period. Here's an example of the schedule I am using for one particular student this year.

Finally, you are able to add parent email addresses so the daily report can either be printed and sent home or emailed home for an electronic signature.

I love that I can analyze the data by the day or across a time period of my choosing. For example, I have a 5th grade student with Asperger's who currently enters his own data for two different goals. Of course, these are not his only IEP goals, but they are the two that he is actively working on improving from day to day and has the ability to self-report.

The two goals that he is currently tracking are: time on task and what "track" he is on during each class period (referring to the Friendship Track - check it out here). He previously tracked his transition times from class to class as well. We keep a post-it note on his desk in each classroom that he attends that either my paraprofessional or the classroom teachers mark tallies for each prompt they have to give to attend to the lesson or follow directions. We gather the post-it notes from the desks and keep them in my classroom until the end of the day. Toward the end of the day, the student comes in and meets with either my paraprofessional or myself to enter the data on the computer. This allows him to self-evaluate, discuss any bumps in the road that day, celebrate his successes, set mini-goals, and visually track his progress. The program graphs his behavior across the day and gives him a final grade. He then emails his graph home to his parents.

The program also has a place to list "Critical Incidents" in Antecedent-Behavior-Consequence format. This is a helpful way to communicate those incidents to parents as well as to keep me from having to document them again in another format for data collection purposes.


On Fridays, we print out a graph that shows the entire week for documentation purposes as well.


Recently, the program came in handy when I wanted to encourage this particular student to challenge himself to improve his time on task. When I first broached the subject, he stated that he didn't think that he could do any better. I was able to quickly run the data for the entire first semester at school and show him that over the last 8 weeks or so he was consistently scoring A's based on our current rubric. When he saw the graph, he decided he did want to challenge himself by decreasing the number of prompts he could receive and still earn an "A". I loved being able to cater to his strength in math by proving his progress in graph form!


Last year, I had the experience of one student's parents frequently excusing inappropriate behaviors because he was tired or his allergies were acting up or he was having digestive problems. Obviously, all of these factors can significantly influence our kids, but I decided to track various factors twice a day for a couple of months to see if I could see any correlation between reported physical complaints and behavior. I created a Likert scale for fatigue, allergies (including "shiners" under the eyes), irritability, distractability, and slow verbal response times (latency). I quickly rated each factor once in the morning and then again in the afternoon based on the student or parent reports and my own observation. Finally, I entered all the data into eDBRC and ran the graphs. The results were surprising. I was expecting to see a correlation between behavior and fatigue and it did not exist. The parent viewpoint of allergy days being correlated to distractability and irritability were not supported either. Now, that made for an interesting parent teacher conference! Without graphing the factors, we would have continued to assume that external factors were causing difficult behaviors.

Currently, I've only used the system for behavior monitoring, but I suspect it could be used for many other purposes (speech goals, social goals, math fluency, reading fluency, etc.). If your student is a visual learner and is mature enough to be involved in tracking his own progress, then this may be a great tool to help them take ownership of their goals. Even if your students are too young or unable to be quite so involved in the process, this is an easy way to keep parents informed about progress more often than progress notes every 9 weeks.

I hope you're able to make use of the Electronic Daily Behavior Report Card in your practice!
~ Kelley